
- All products are added to your cart.
install robotic lawnmower
Installing a Robot Mower
A robot mower is, of course, a great help in the garden. However, it must be installed correctly to function properly. We have outlined the steps for proper installation below.
Step 1: Keep this in mind!
- Make sure the robot does not operate on a lawn larger than it is suitable for.
- The robot mower drives in the middle of the boundary wire to return to the charging station.
- The boundary wire must always be laid as one large loop, and the robot will continue to operate between the boundary wires.
- Ensure that there are no metal objects or other items on the lawn.
- For app use (if your robot mower has an app), make sure there is good coverage throughout the garden.
- Ensure that there is a power connection within 5 meters of the lawn.
Don't have a robot mower yet, but want one? Check out 'How to choose my robot mower'!
Step 2: Preparation
- Make sure you have a sketch or a clear view of your garden and determine where you can best connect power.
- Decide where the charging station should be placed. It must be close to the power outlet.
- Ensure that your robot mower is suitable for the size of your lawn.
- Remove any loose objects from your lawn, such as branches or other debris.
- Mow the lawn thoroughly low once, so the robot can work efficiently and maintain the grass at an optimal length.
Step 3: Place the Charging Station
- It is important to place it close to a power outlet.
- Position the charging station at the edge of the lawn on a flat surface.
- Try to place it in a cooler spot, such as a shaded area, to prevent the battery from overheating.
- Ensure there is enough space around the charging station so that the robot can enter and exit smoothly. Check the manual for more specific information.
- It is very important that the charging station is positioned so that the robot exits to the right. This applies to Hans, Teun, and Katrien; for other models, refer to the manual.
- After laying the boundary wire (Step 4), the wire that passes under the charging station must be connected to the red connector.
The other end of the boundary wire should be connected to the black connector. More information can be found in the manual. For further details, check the article in our help center about the placement of the charging station.
Step 4: Laying the Boundary Wire
- Start at the charging station and lay the boundary wire as a large loop around the edge of your property. Check the manual and use the supplied ruler to determine the distance from the edge of your lawn.
- When laying the boundary wire, you must keep a 30cm distance between the boundary wire and the edge.
- If there is a path next to the lawn that is the same height as the grass, you can lay the boundary wire 5 to 8cm from the edge, allowing the mower to partially ride over it for better edge mowing.
- Obstacles that the robot cannot or should not bump into must be marked off. This can be done with border edges, stakes around a tree, or a loop of the boundary wire. Trees or other solid objects do not need to be marked off, as the robot can bump into them and turn around.
- Secure the boundary wire with ground pegs. Due to mulching, the boundary wire will become less visible and sink slightly into the grass over time.
- We recommend first securing the boundary wire with just a few pegs. This allows for easy adjustments after an initial test run. Make sure the mower blade is completely raised or the blades are removed. Otherwise, the boundary wire could get cut.
- We recommend, if possible, not to bury the boundary wire. If buried, it may sink further over time, eventually preventing the mower from receiving the signal properly. If you still wish to bury it, we recommend doing so at a maximum depth of 5cm.

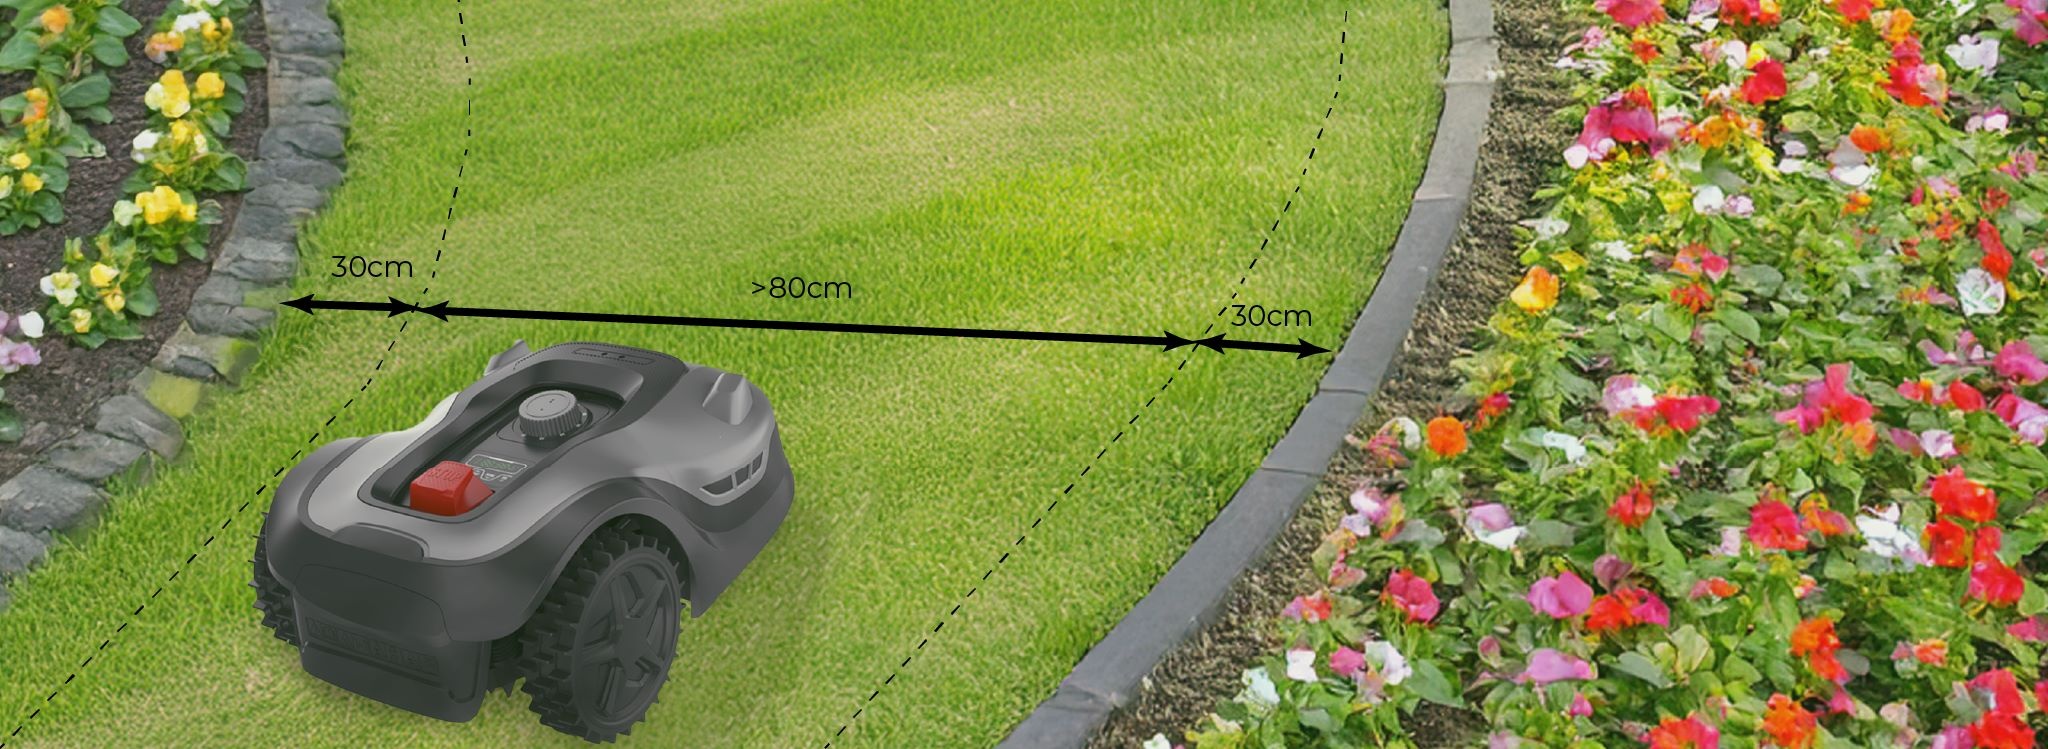
Mowing Multiple Zones? No Problem!
- Our robot mowers can navigate and mow through narrow passages of 0.8m. (see image in Step 4). Ensure that, in addition to the 0.8m, there is also a 30cm space on both sides between the wire and the edge.
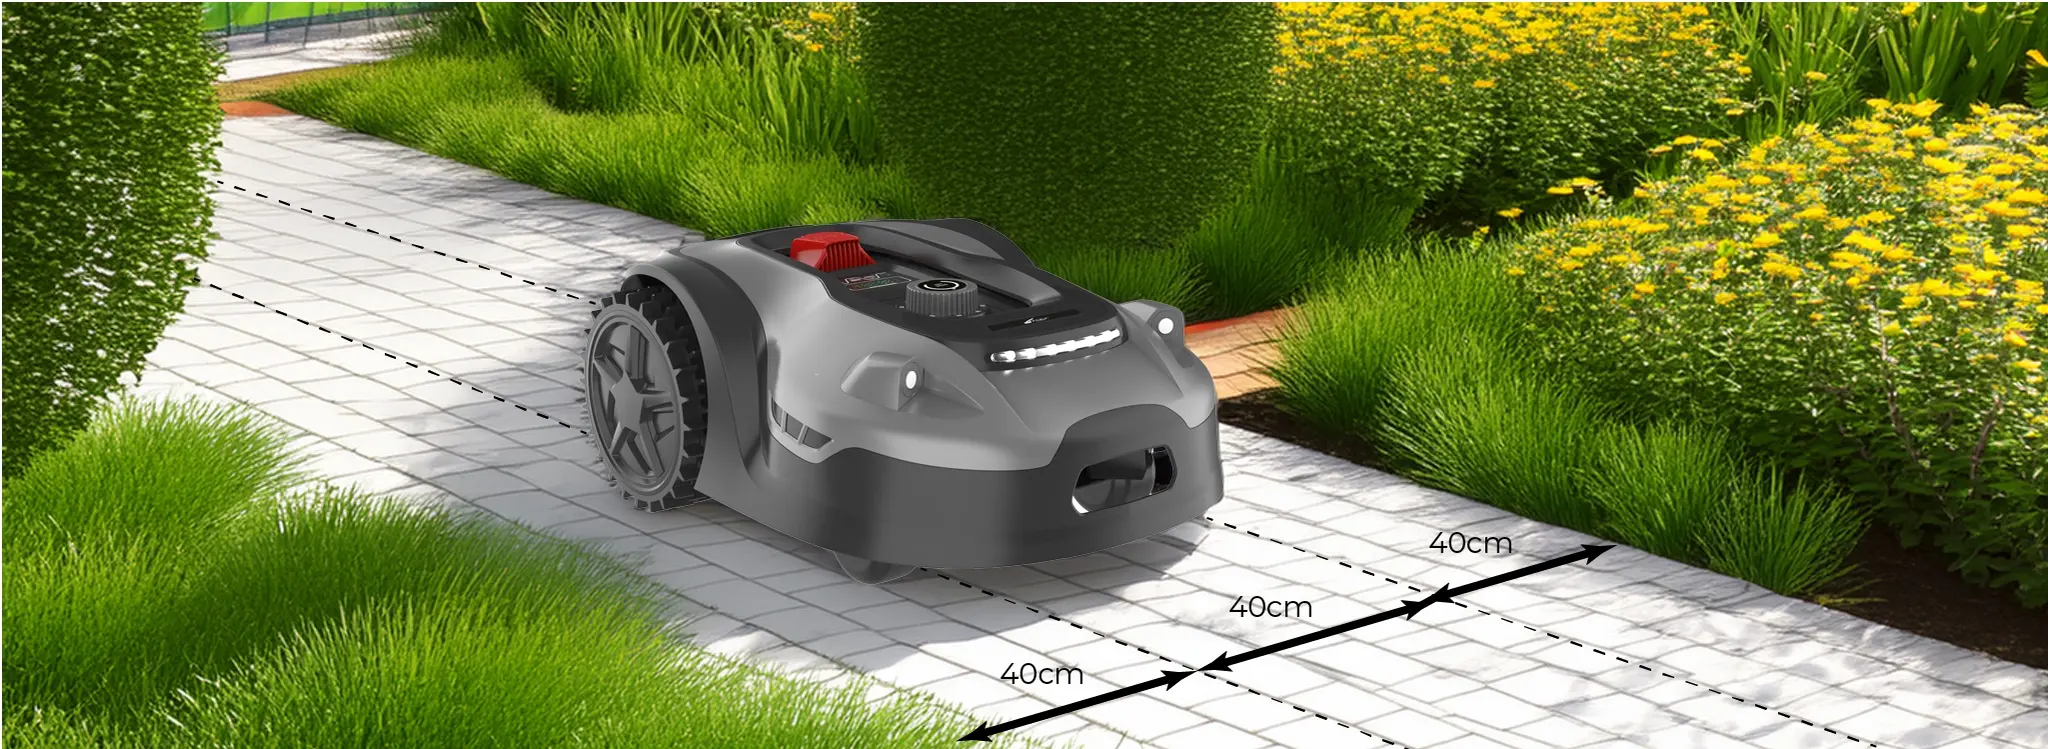
- Do you have two grass areas (e.g., front and back yard) connected by a path? If the path is the same height as the grass, the robot mower can drive over it to reach another grass section. In this case, you can lay the boundary wire closer together: 40cmx40cmx40cm. Since the robot mower does not need to mow the path, it only needs to cross the boundary wire to reach the other lawn. The boundary wire must always be a large loop (and cannot have branches).
Step 5: Connect the Charging Station to Power
Bring the power cable into the charging station. Turn on the robot mower and place it in the charging station to charge. Ensure that the robot mower makes proper contact and that the charging station is correctly connected to charge the mower.
Step 6: Robot Mower Screen Settings
Once everything is installed, you can further configure the robot mower. You can change the language and set up a PIN code, which you will need to use the robot mower. Check that the robot mower operates correctly and walk alongside it to ensure the boundary wire is properly laid. This means it should be at the correct distance from the edges, flat on the ground, and not resting on the grass.
Also, set the mowing height to your preference. We recommend starting with a higher setting and gradually lowering it.
If you need advice on choosing a robot mower, check out Robot Mower Advice
*User Manual Robot Mowers Hans
*User Manual Robot Mowers Teun and Katrien